

How to Create an FTP Account
File Transfer Protocol (FTP) is a very fast way to uploading and downloading content between your hosting account and your computer. While it does require an FTP client to use, such as FileZilla or Cyberduck, it provides a means to upload whole folders at once, without needing to be compressed first! While we're go over connecting to an FTP client later, here is how you can create a FTP account from cPanel:
- Login to your cPanel account.
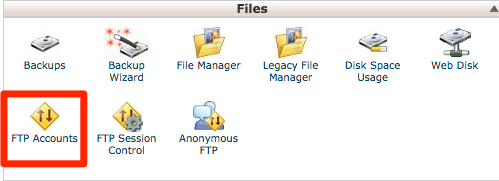
- Scroll down your cPanel home page until you locate the 'Files' section, and from there, select the 'FTP Accounts' icon.
-
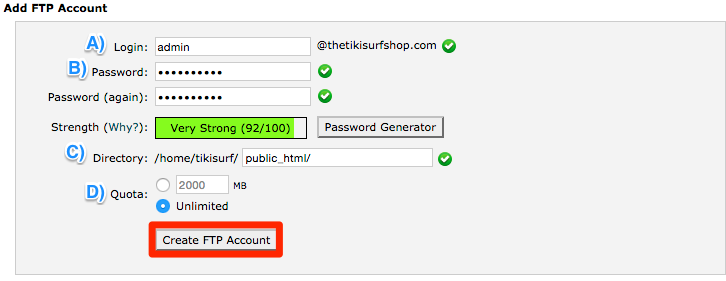
The top of the next screen will be a form allowing you to add a new FTP Account.
- Your FTP username. Note how it includes the domain at the end.
- The FTP Password needs to be at least 5 characters in length and have a password strength of 50 or more to be accepted.
- By default, the directory path will create a new folder behind public/html, which means the FTP account can only connect to that folder, and everything below it. If you want more access with the FTP account, be sure to change the Directory to begin with the folder you want. In most cases, this will be public_html.
- You can set the amount of data that can be transferred at one time, or simply set the value to unlimited.
Note
. This login information should be written down somewhere, as you will use it to connect to your FTP client later when you are ready to use it.
- When you finish setting up the account, select Create FTP Account to save the changes and add the FTP account to your hosting.

How to Connect to an FTP Client
Creating an FTP Account is wonderful, but to use it we need to connect to a client that will create the connection between your hosting account and you.
How to Restore your Site Using a Backup
Backups are taken nightly and are stored for upto 7 days, any of these backups can be used to restore your site to the way it was on the previous day.