

Zimbra - Creating an Email Signature
Login into the Zimbra web client.
Creating an Email Signature
- Login into the Zimbra web client.
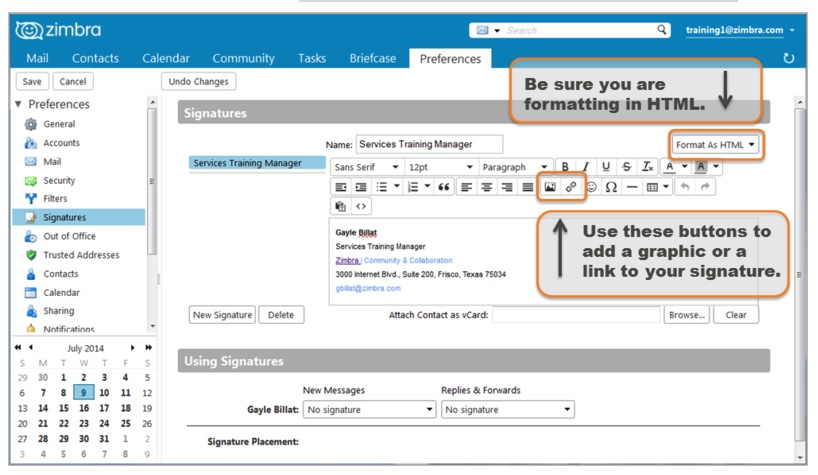
- Click on the ‘Preferences’ towards the top of your screen.
- Select ‘Signatures’ on the left column.
- Then use the formatting options to create your email signature.
- Be sure you are formatting in HTML. If you cannot see the HTML options, change the option in the drop-down menu to ‘Format As HTML’.
- Click the graphic button to add a graphic to your signature.
- Click the link button to add a link to your signature.
- Select ‘New Signature’ to save your new email signature.
Zimbra Blacklist and Whitelist
At times it is necessary to block or allow an email from a specific individual, domain or IP address and override the system settings.
Zimbra Email Clients
Older PCs (32 bit)) + Step-by-step guide Zimbra Desktop + For Windows + For Mac OSX Zimbra Web + Zimbra Web for any web browser Other Mail Clients + Manual Mail Client.